Ripple Tank Practical
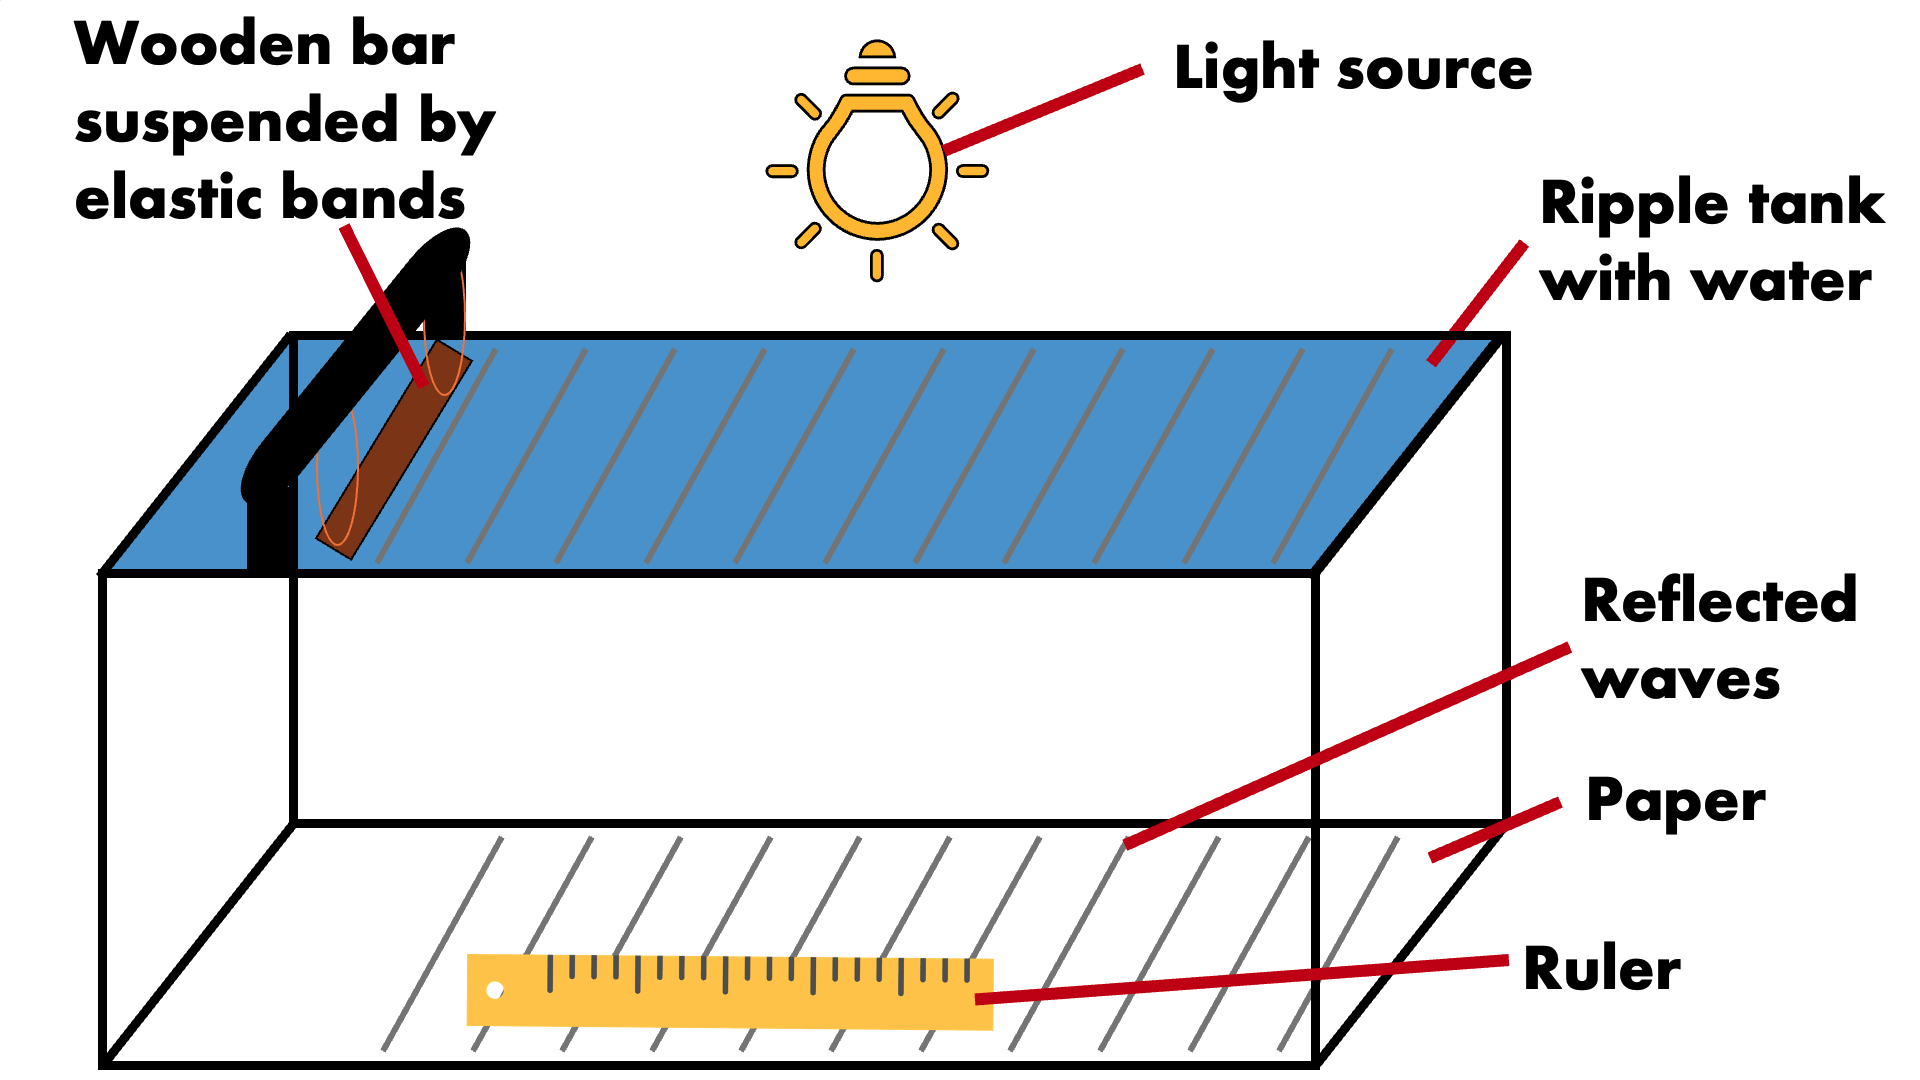
- Set up a ripple tank over a piece of paper
- Shine a light source through the ripple tank
- Turn off the lights in the room and shut the curtains, ensuring that the room is dark
- To measure wavelengths, place a ruler on the piece of paper perpendicular to the wave fronts. Measure the distance between as many wavefronts as possible and divide by the number of waves
- To measure frequency, count the number of wavefronts that pass a point in 10 seconds and divide the result by 10
- Caculate wave speed using the equation:
Wave speed = wavelength × frequency
Safety Concerns
- Do not stare directly at light source
Waves in a Solid Practical
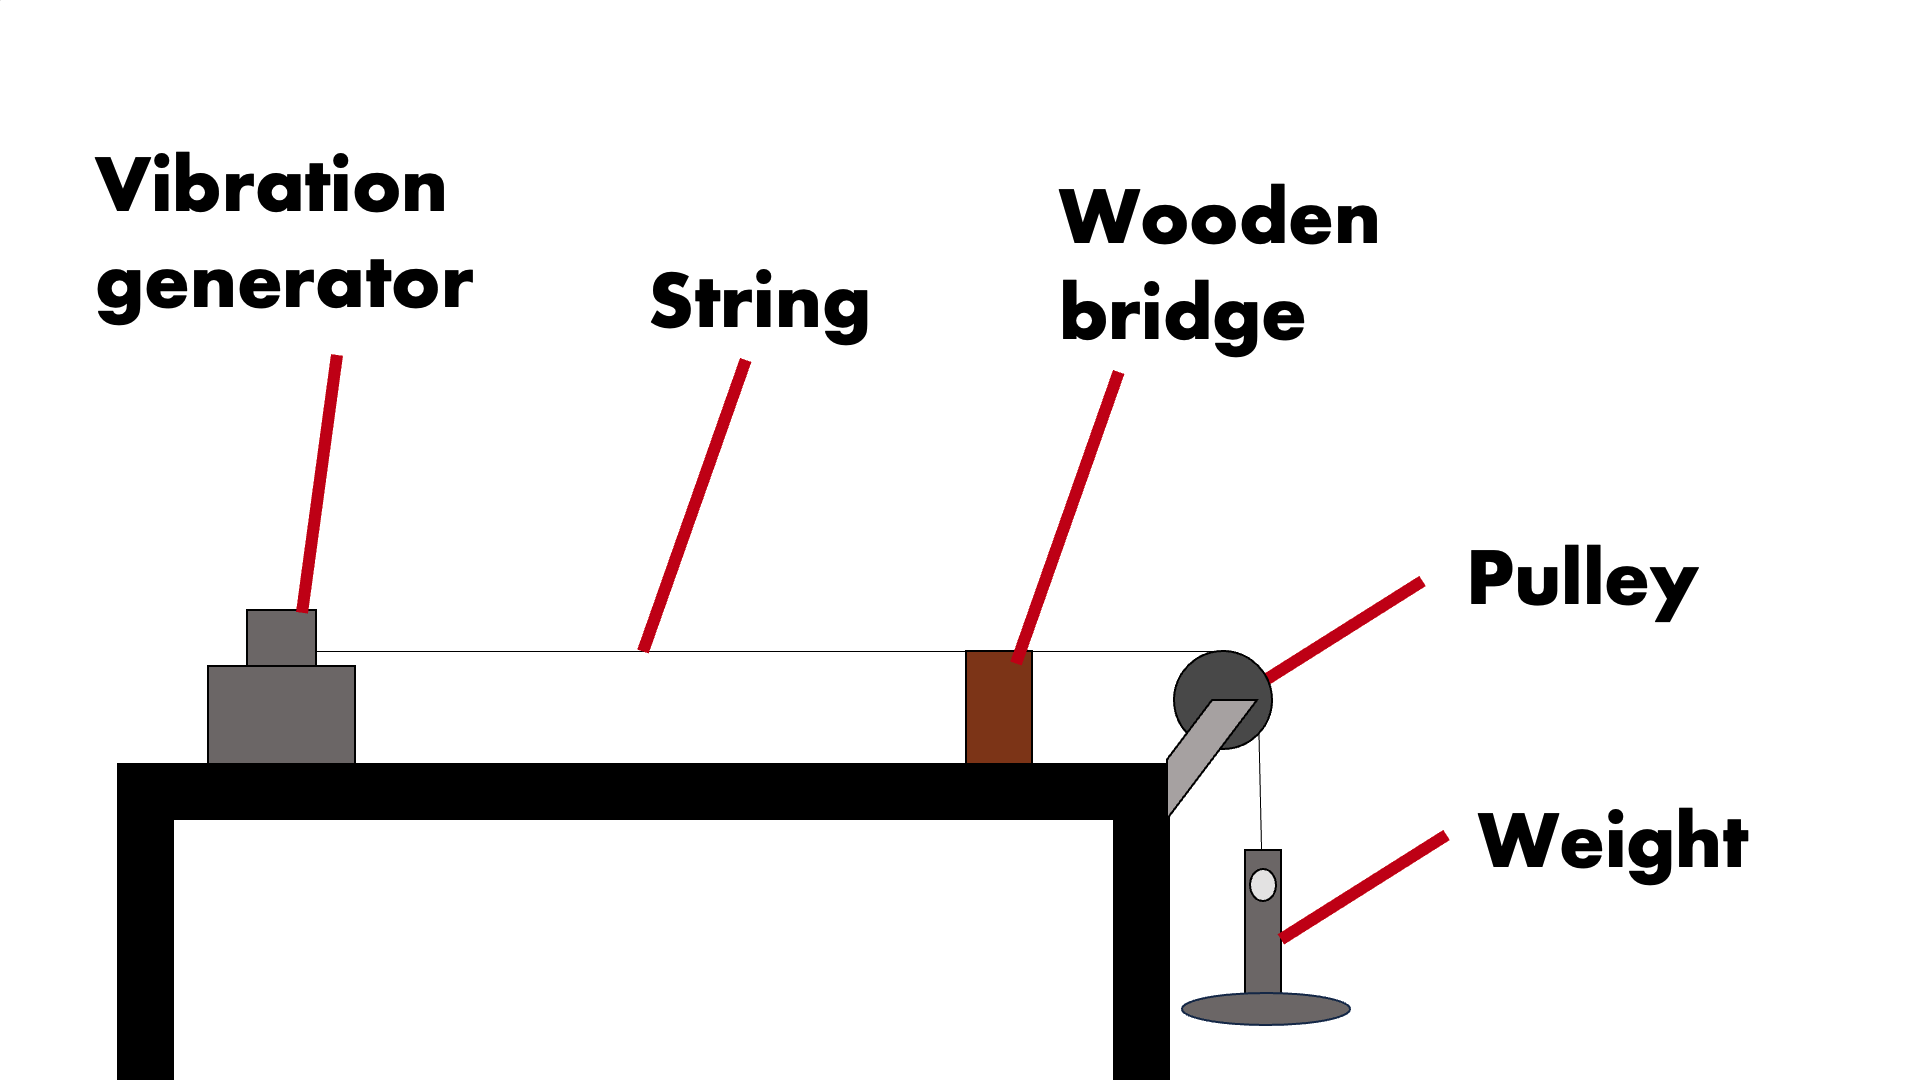
- On a table, set up a string running over a pulley and wooden bridge, attached to a vibration generator and a weight
- Turn on the vibration generator and adjust the frequency until the string begins to vibrate only vertically
- To measure wavelength, use a meter ruler to measure the distance between multiple standing waves, and divide the result by the number of waves measured
- To measure frequency, use a timer to time the amount of time it takes for 10 oscillations. Divide the result by 10 to find the time period, then use the equation:
Frequency = 1/time period - Find the wave speed using the equation:
Wave speed = wavelength × frequency
Safety Concerns
- The string may snap
Light Practical
1
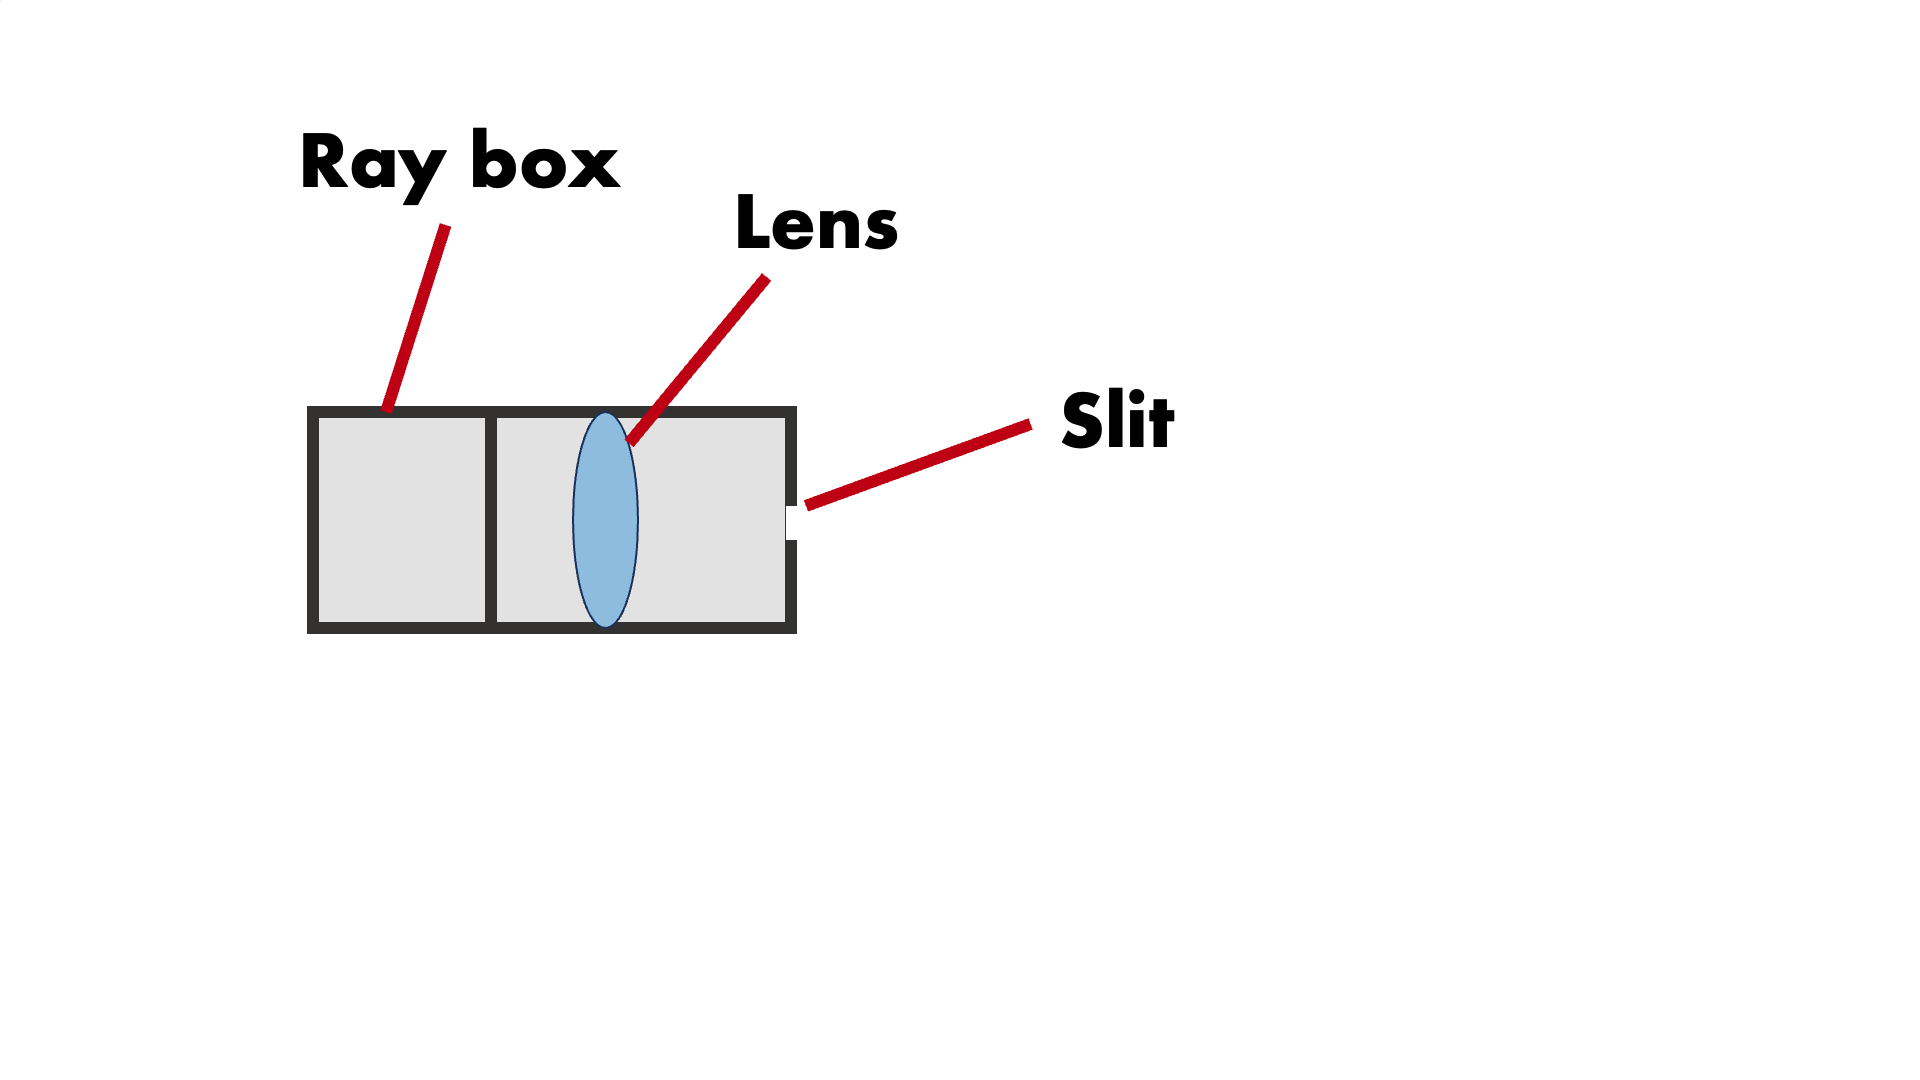
Ray box Setup
- Set up a ray box with a lens and a slit
Safety Concerns
- Glass lenses can smash and cause cuts
2
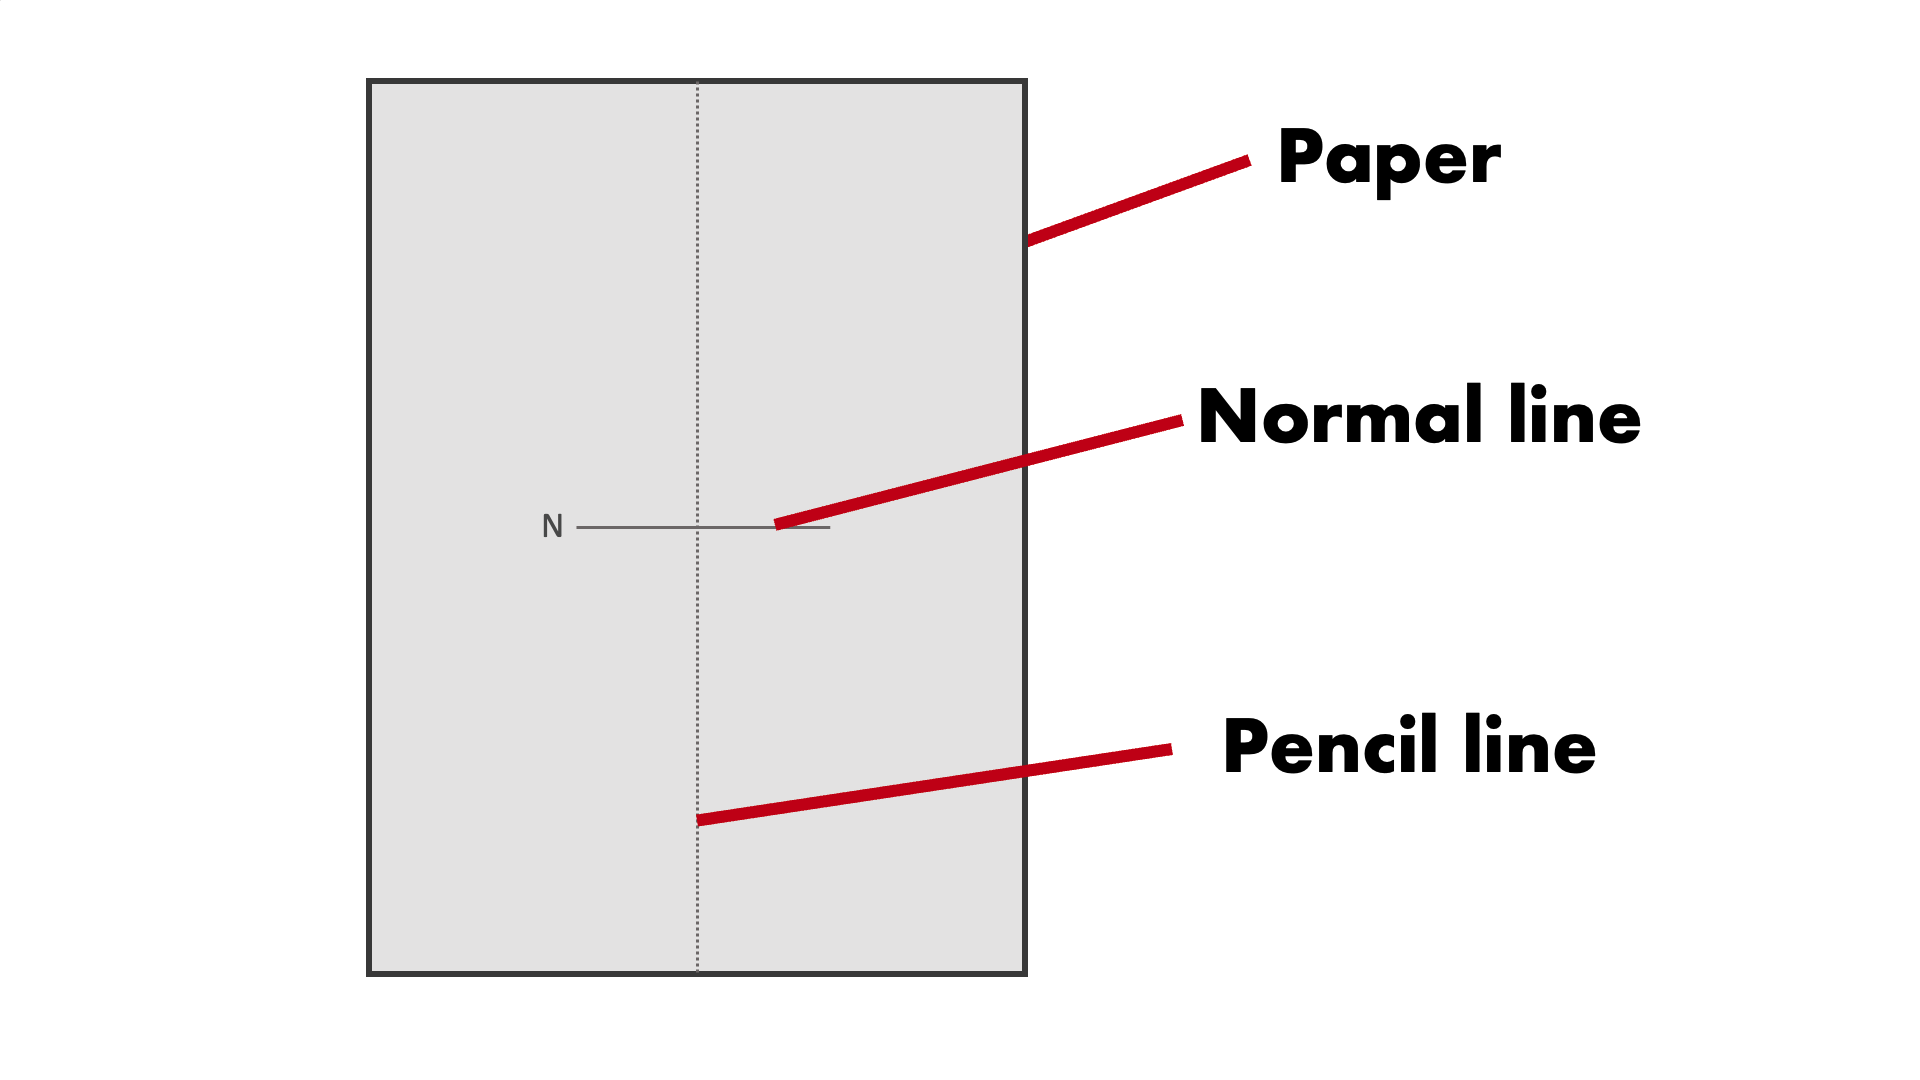
Paper Setup
- Using a ruler, draw a pencil line down the center of the paper
- Using a protractor and a ruler, draw another pencil line adjascent to the initial pencil line. Label this line N
Safety Concerns
- Lead pencils should not be injested
- Avoid painful papercuts
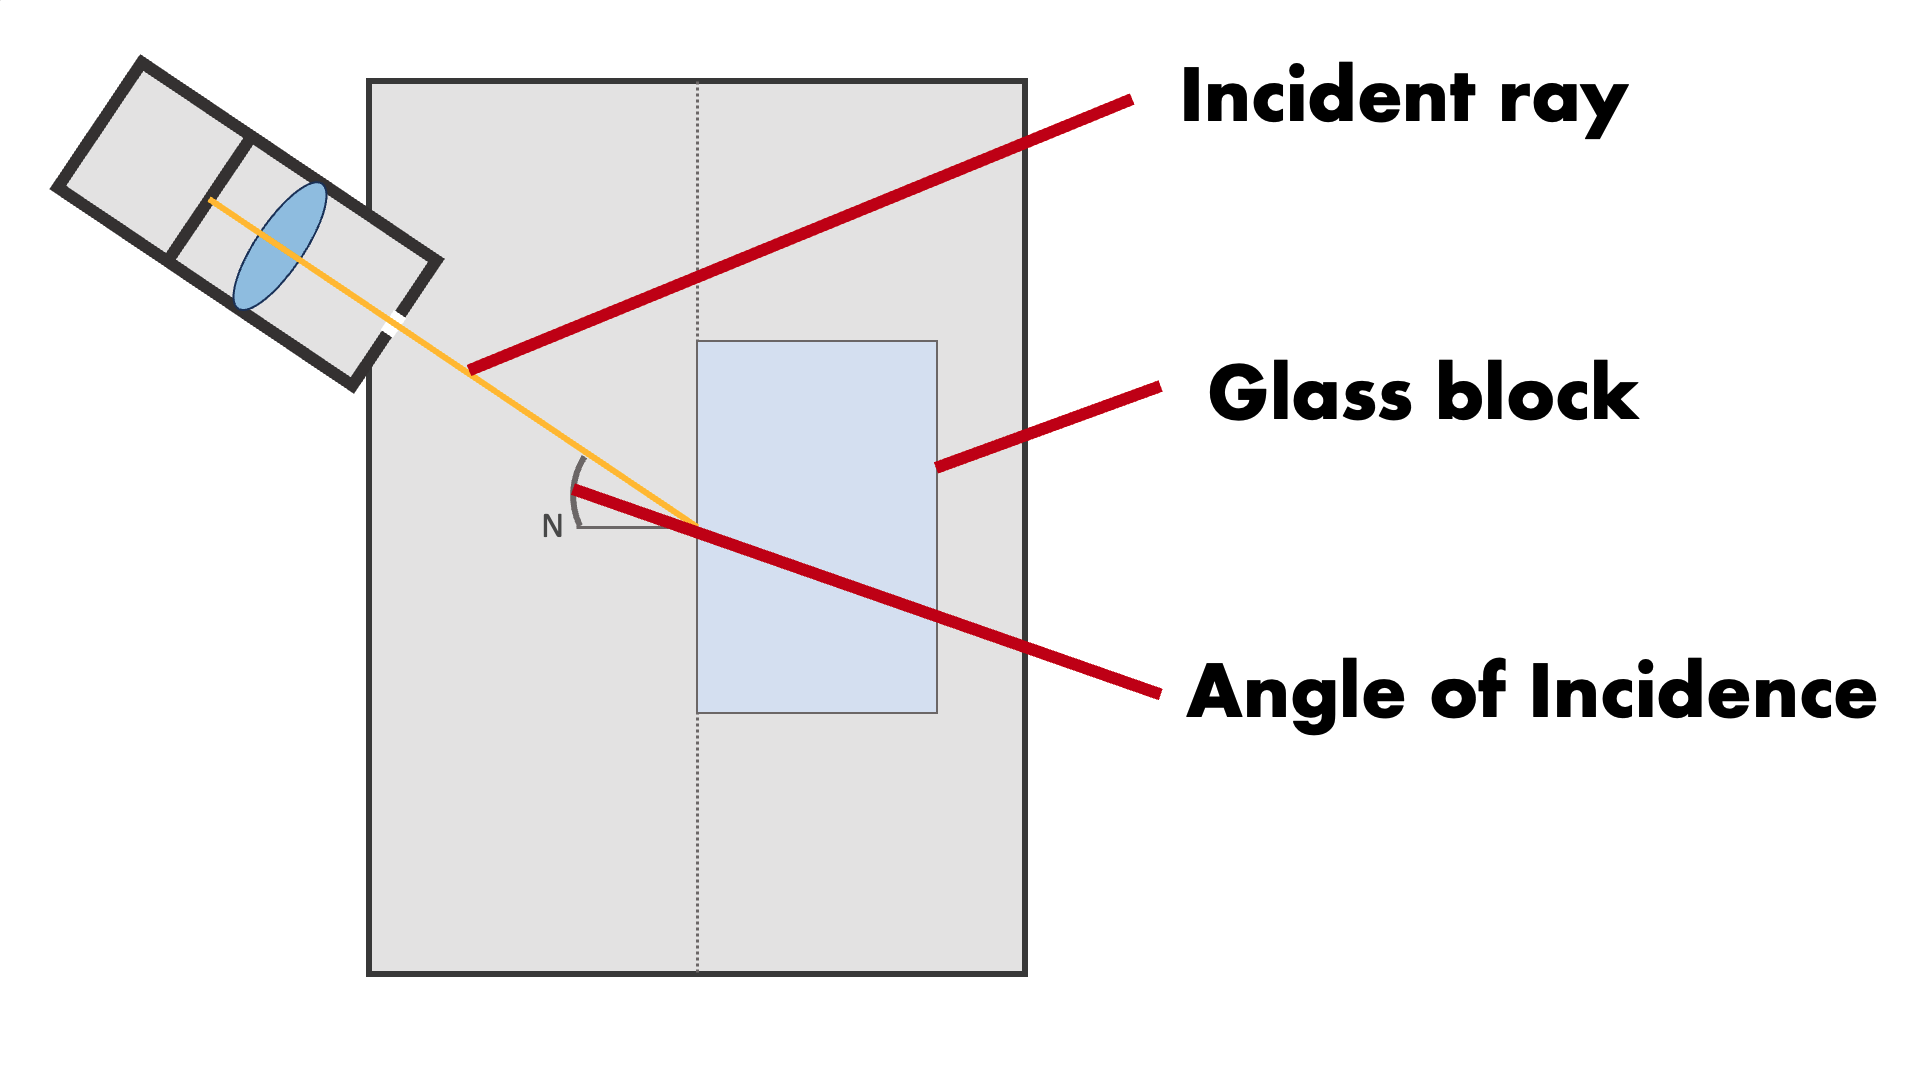
3
Adding light
- Place a glass block on the border of the initial pencil line
- Turn off all the lights in a room and close curtains, ensuring that it is dark
- Turn on the ray box
- Aim the ray emitted by the ray box at the point where the normal line and initial line intersect
Safety Concerns
- Glass can smash
- Do not stare directly at the light source
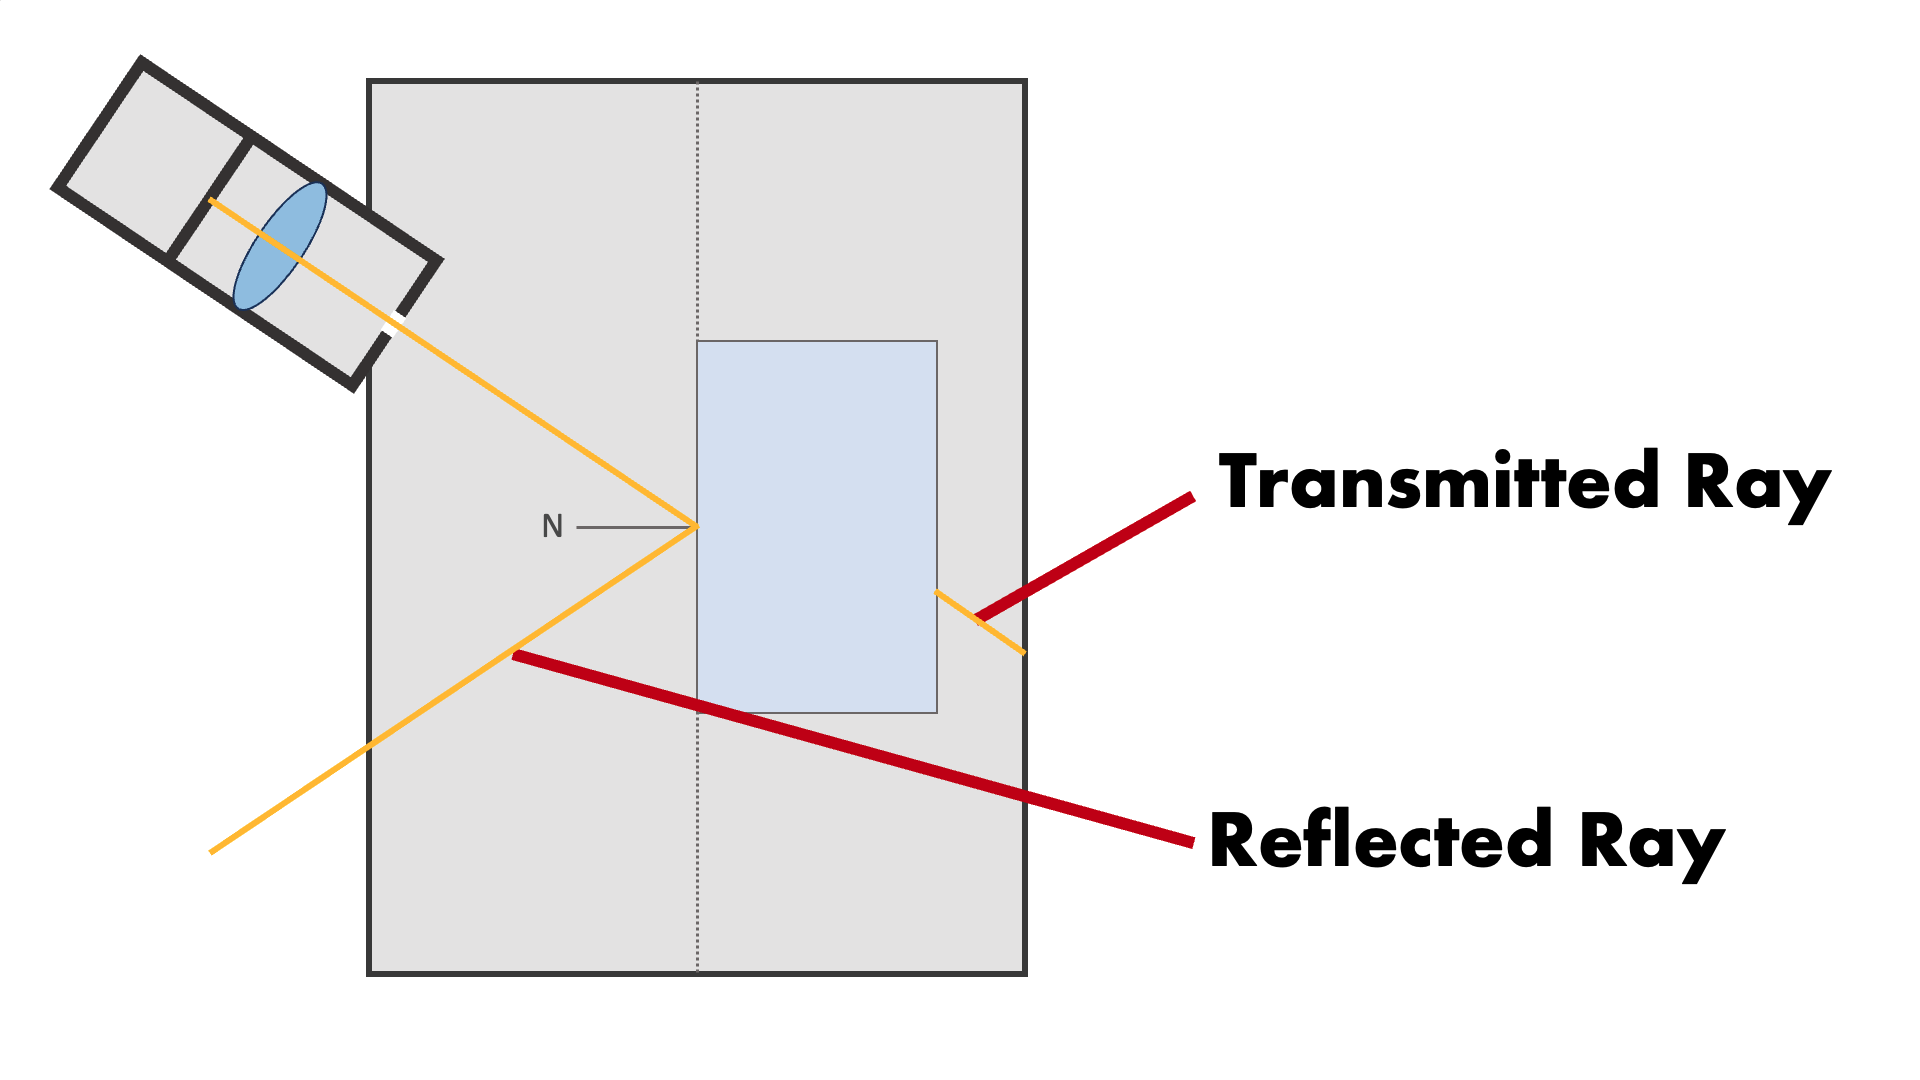
4
Finding a reflection- Adjust the position of the ray box until a reflected ray is visible
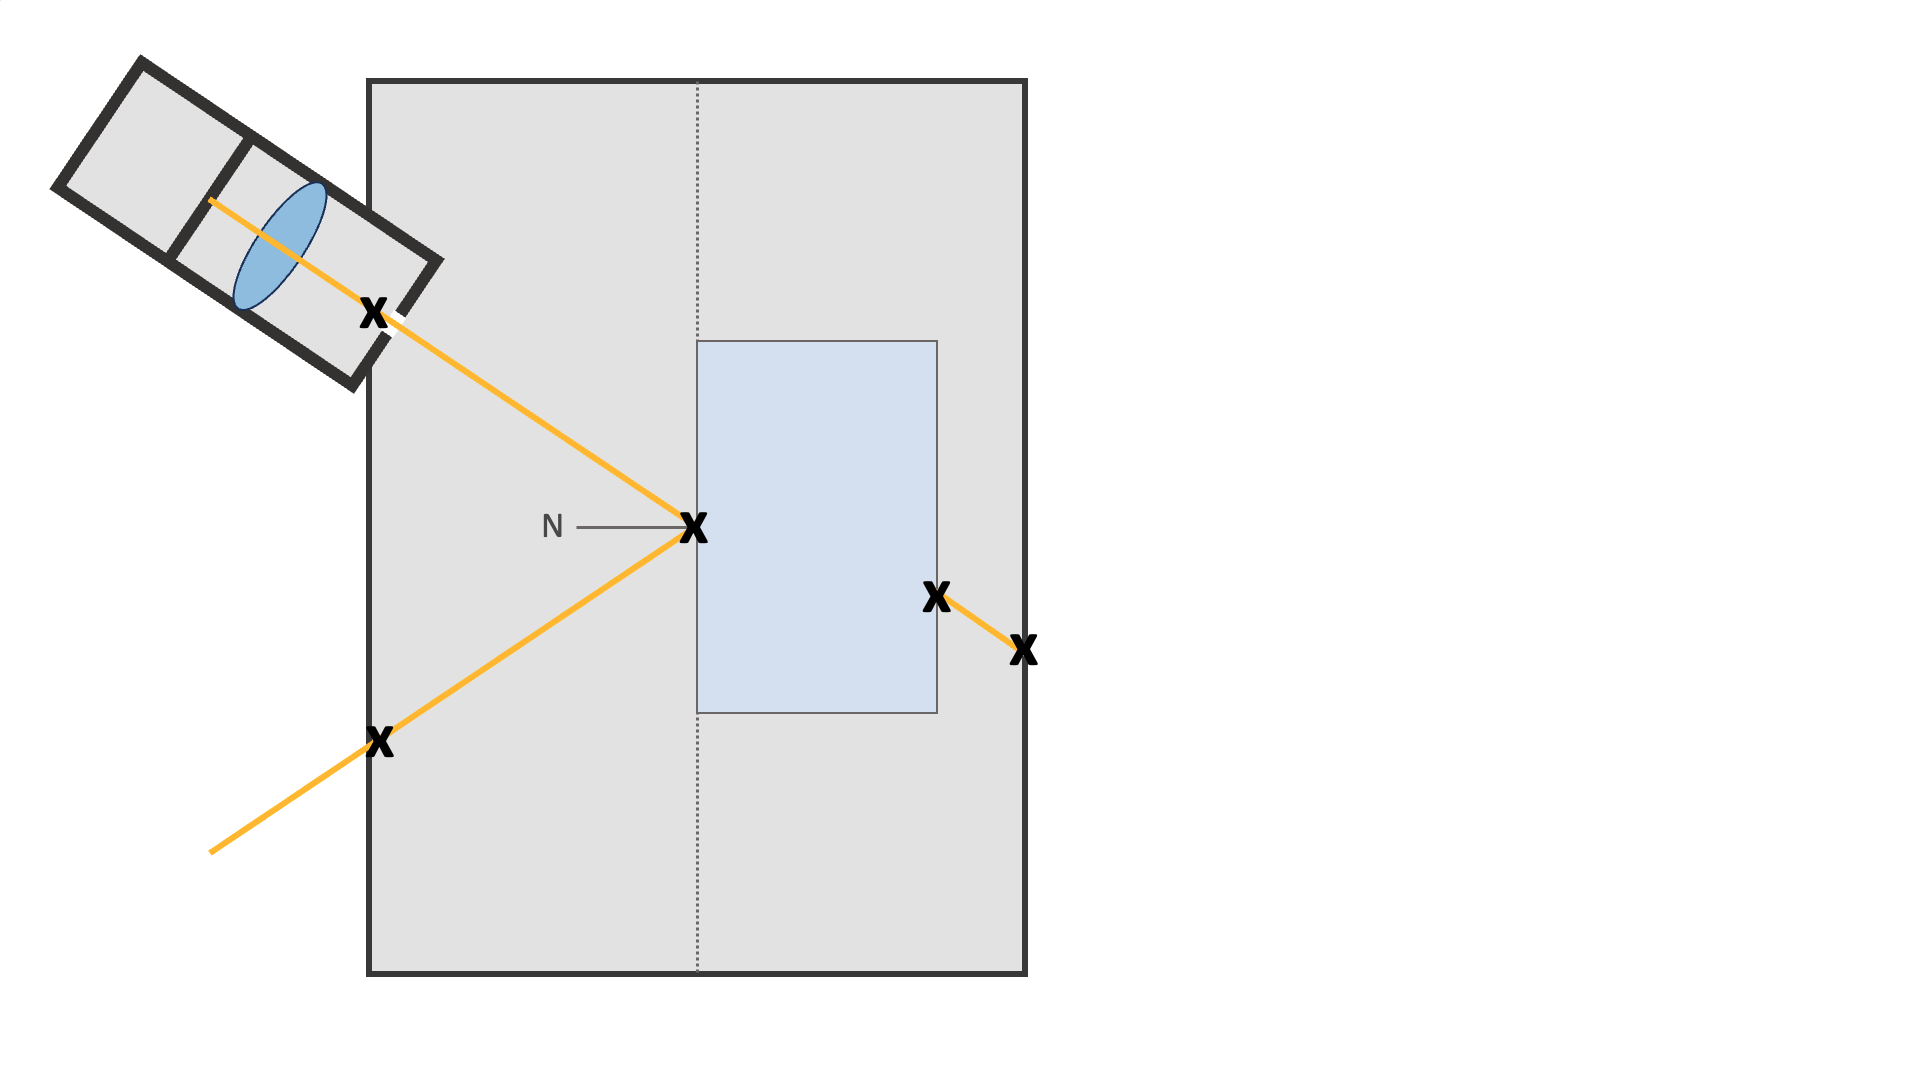
5
Markings- Mark with crosses two points on the incident ray, the reflected ray, and the transmitted ray
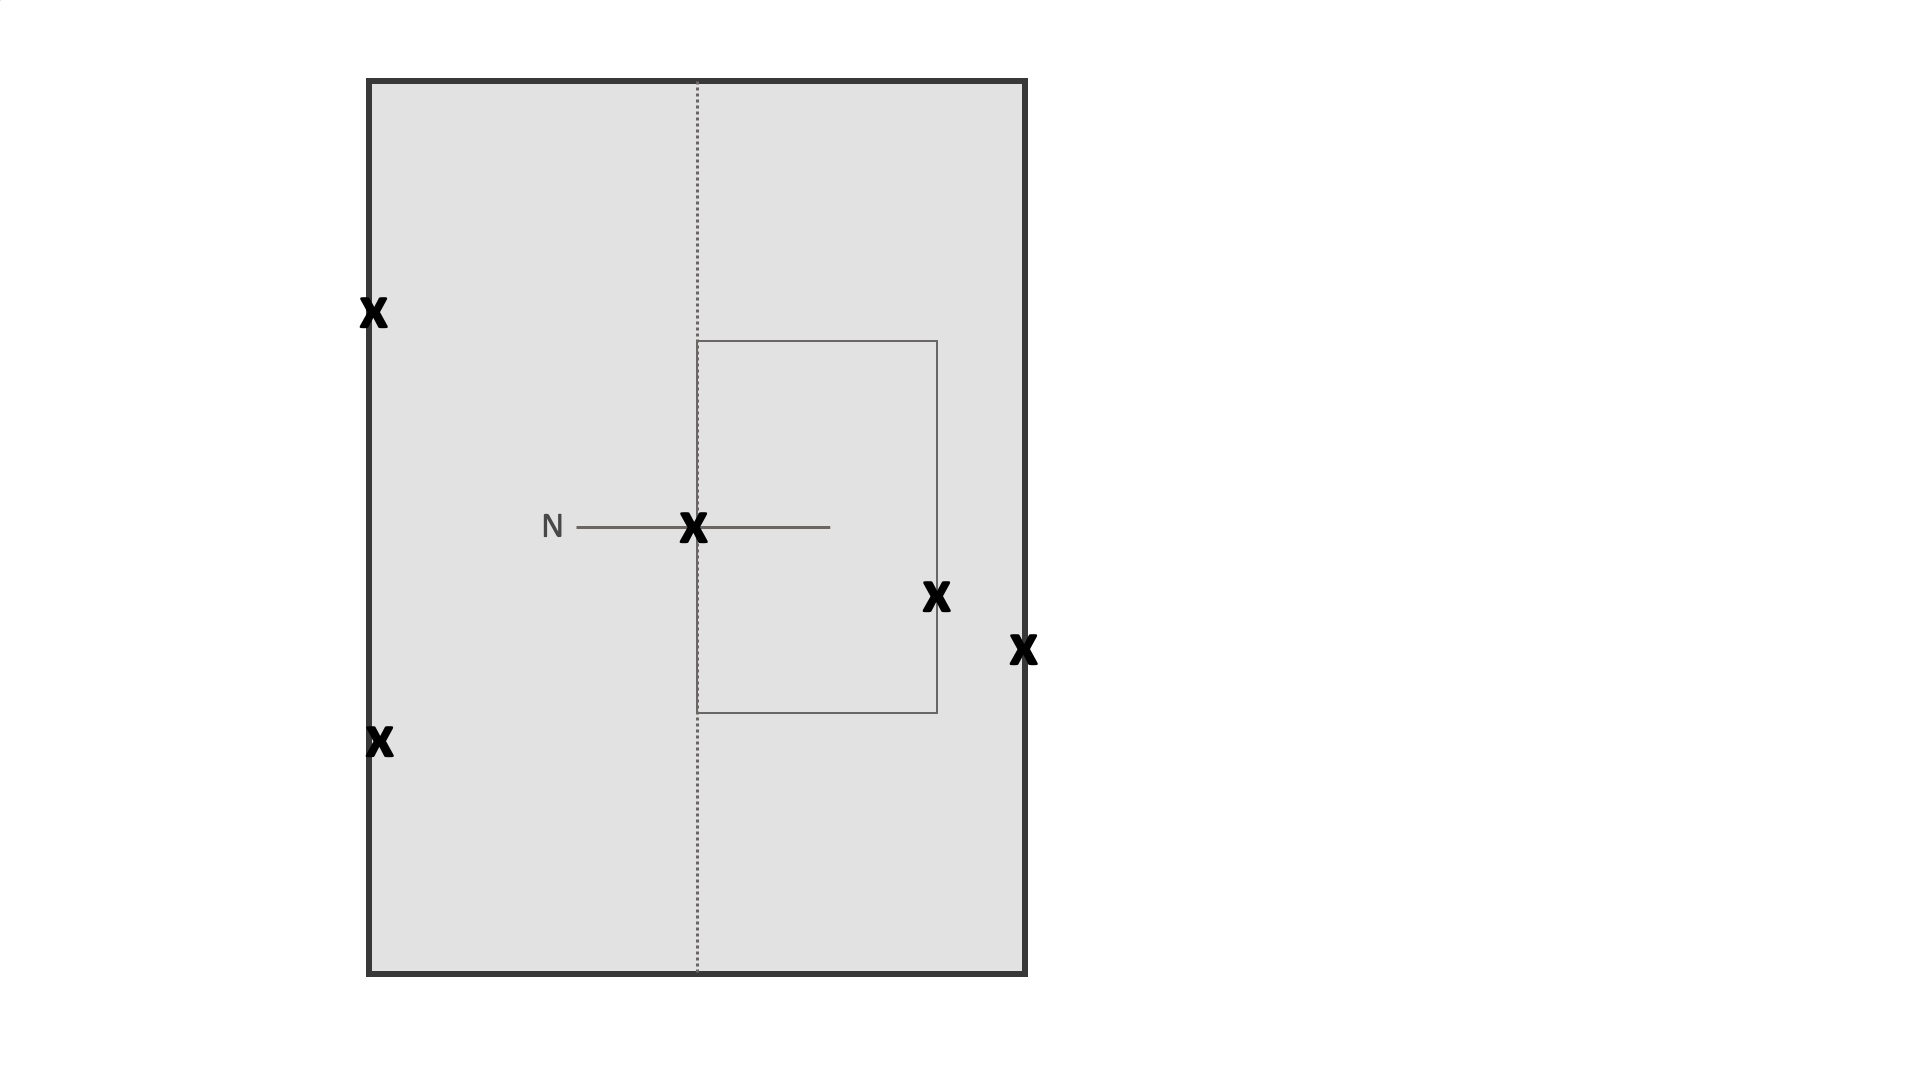
6
Remove everything- Turn back on the lights of the room and open the curtains
- Turn off the raybox
- Remove the glass block
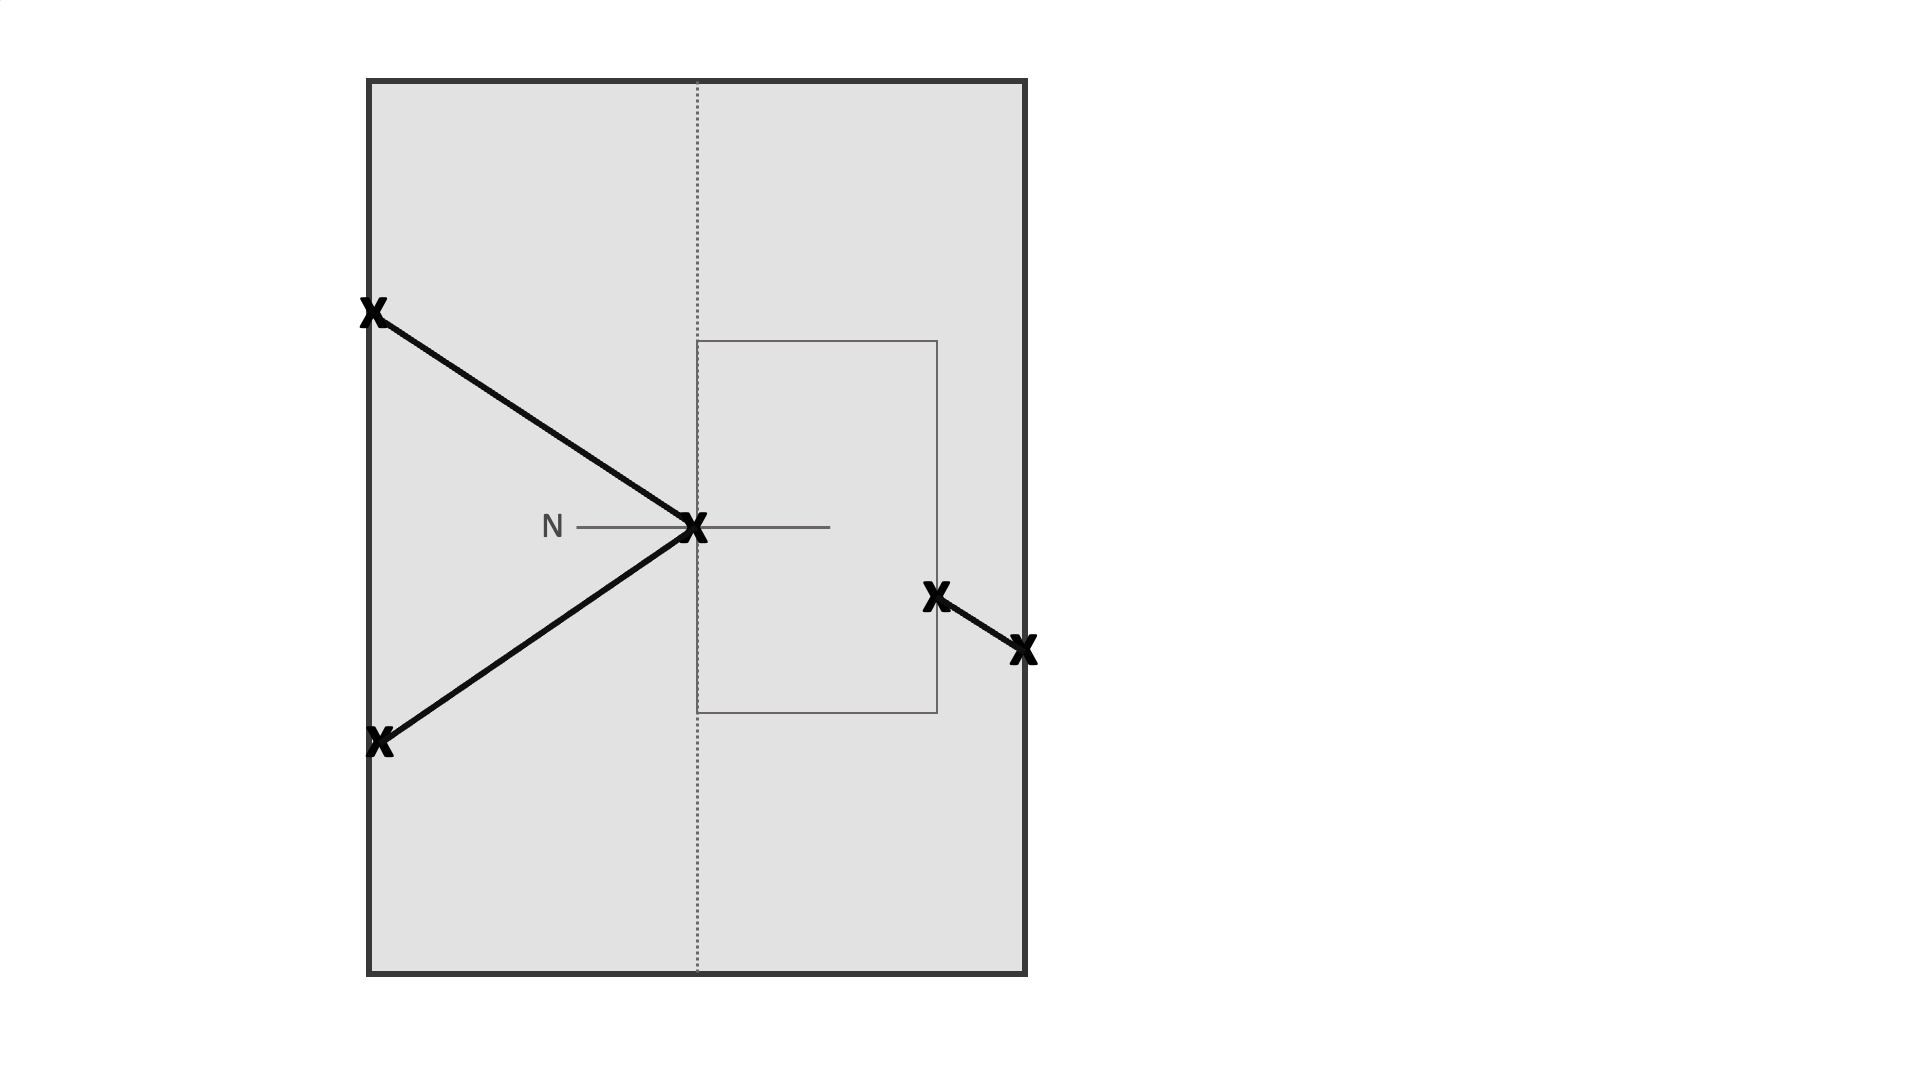
7
Connecting the dots- Turn back on the lights of the room and open the curtains
- Draw a pencil line between the two points of the reflected line
- Draw a pencil line between the two points of the transmitted line
8
Connecting even more dots- Draw a pencil line connecting the transmitted line to the shared point of the incident and reflected line
- Using a protractor, measure the angle between the normal line and the incident line
- Using a protractor, measure the angle between the normal line and the reflected line
- Using a protractor, measure the angle between the normal line and the refracted line
- Repeat the entire experiment again, using a different block of material
Radiation Practical
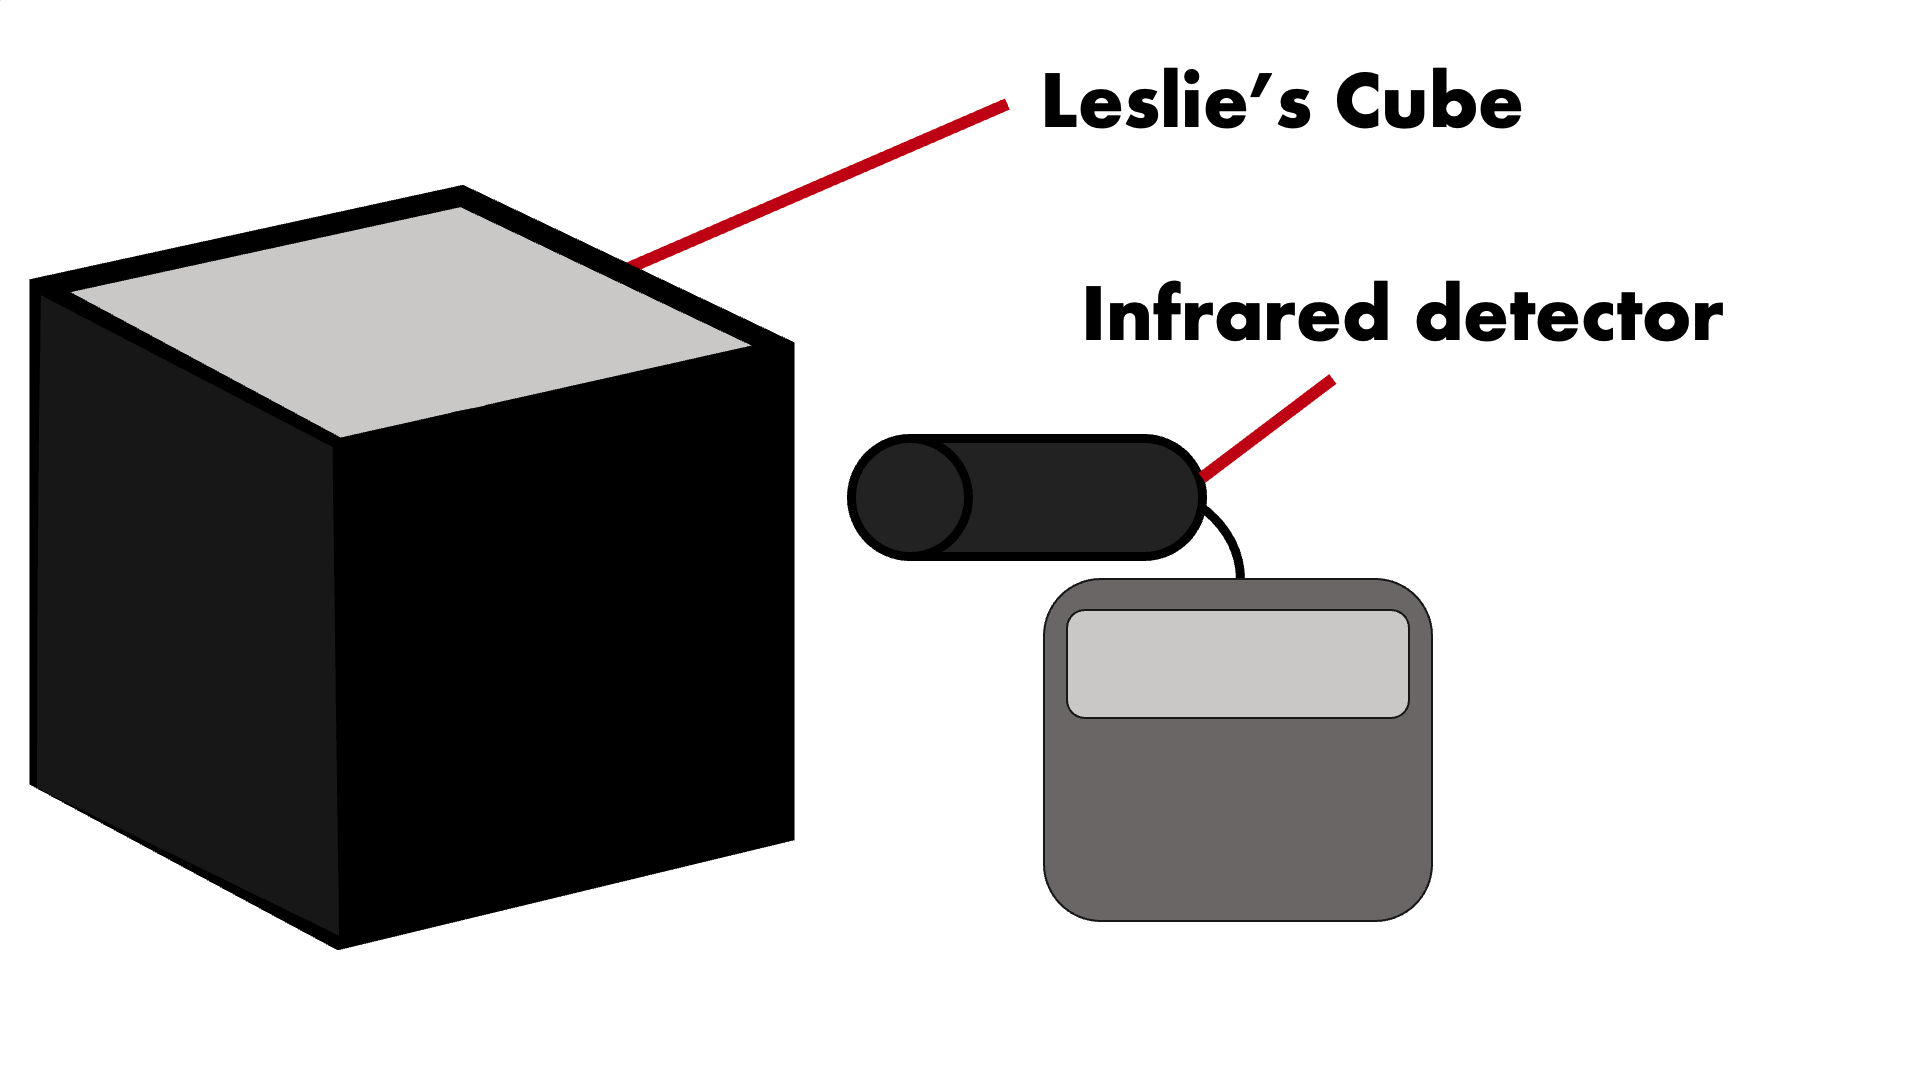
- Put a Leslie cube on a heat proof mat
- Align a radiation detector 20cm away from one side of the Leslie Cube
- Fill the Leslie cube with boiling water
- Turn on the radiation detector
- Measure and record the radiation at each surface of the Leslie Cube
Safety Concerns
- Boiling water